Navigate to Projects > Calendar from the left sidebar.
Click the "+ New Event" button in the top right corner.
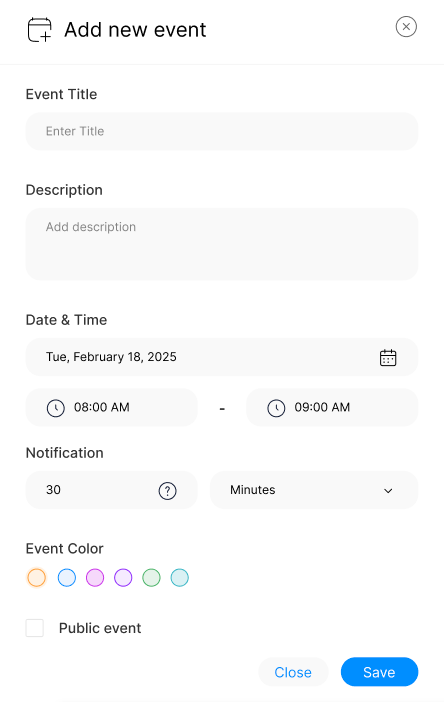
Event Title: Enter a descriptive name for the event.
Description: Optionally, add details about the event.
Use the calendar icon to pick a date.
Set the start and end time for the event.
Choose when to receive a reminder before the event.
Set a notification time in minutes, hours, or days.
Select a color-coded option to categorize events visually.
Check the "Public Event" box to make it visible to others.
Leave it unchecked for a private event.
Click "Save" to add the event to the calendar.
Click "Close" to cancel without saving.
By using the Add New Event feature, users can efficiently schedule tasks and keep track of important deadlines within ClearCRM.
