Forms in ClearCRM allow businesses to collect customer information, generate leads, and automate marketing efforts. Below is a step-by-step guide to creating a form within the platform.
Log in to your ClearCRM account.
From the left-hand navigation menu, go to Marketing.
Click on Assets & Forms.
Ensure that you are on the Forms tab at the top.
Click the "Create Form" button.
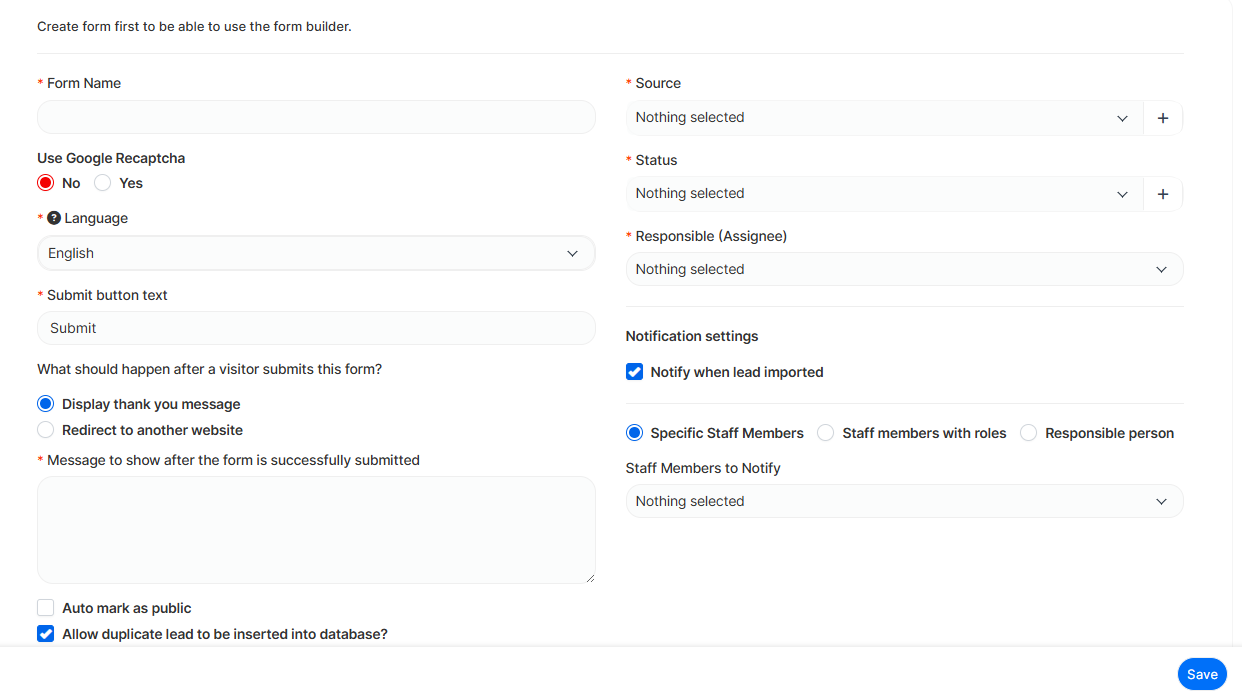
Fill in the required fields:
Form Name (Required): Choose a descriptive name for the form.
Use Google Recaptcha: Select "Yes" if you want to enable Captcha verification for spam protection.
Language (Required): Choose the form's primary language.
Submit Button Text (Required): Customize the text on the submit button.
After Submission Action:
Choose whether to display a thank-you message or redirect visitors to another webpage.
If displaying a thank-you message, enter the message content.
Source & Status:
Select the source (where the lead came from) and status of the form submission.
Assigning Responsibility:
Assign the form responses to a specific staff member or responsible person.
Notification Preferences:
Check the box to notify when a lead is imported.
Choose to notify specific staff members, roles, or the responsible person.
Other Options:
Enable Auto Mark as Public if you want the form to be accessible publicly.
Allow duplicate leads to be inserted into the database if needed.
Once all fields are configured, click Save.
The form is now ready for use and can be embedded on websites or shared via a direct link.
